
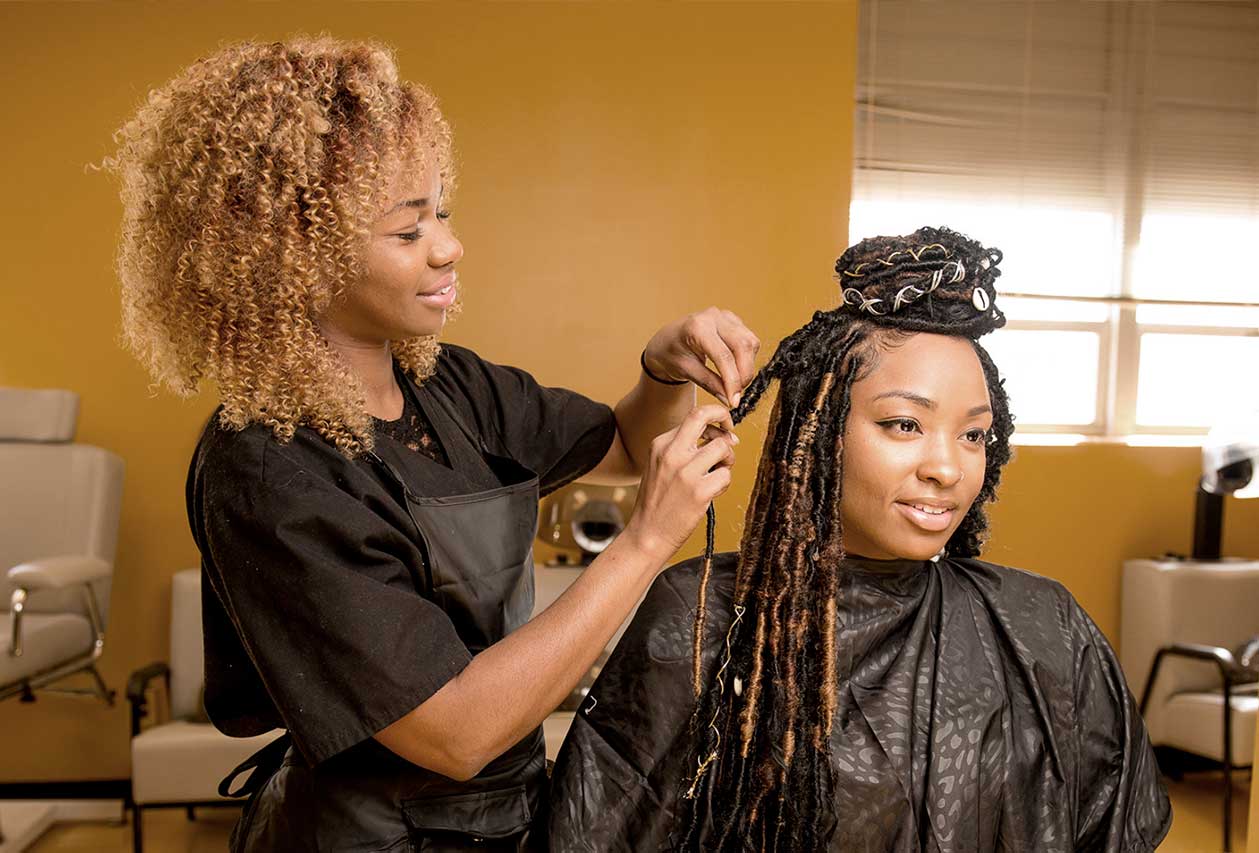
NaHaZo’s ultimate guide to braid hair care in 2024 is a handy guide for all things protective styling via braids and how you can care for and grow your hair to its maximum potential.
We share insight on how to care for your braids and your hair under your braids by doing the following:-
Let’s get into it.
1. Think Lifestyle
Before you install your braids, be mindful of your lifestyle.
You should ask yourself if the braids you want to install agree with your lifestyle.
If you exercise a lot or are a big outdoorsy person, then it may be worth your while to style your hair in short, medium-sized braids.
These braids will place less strain on your edges when you move around during workouts. Also, it allows you to tie your hair up, without having it fan down your shoulders or back, unlike longer braids.
Similarly, long box braids or thin, long braids may not be ideal as the pressure on your edges increases as you move around. This will not only cause thinning but may cause traction alopecia down the line.
If, however, you have a more relaxed lifestyle, then you can go for long box or thin braids as your daily activities are not likely to put pressure on your scalp.
This is an important consideration to have before installing your braids and you do not want to take the time, money, and effort to have braids installed and find that they do not match your lifestyle or suffer as a result of your daily activities.
Catch up on NaHaZo’s top tricks on how to thicken your hair naturally.
2.TLC before installation
Give your hair some TLC before installing braids, especially if you are going to have it in protective styling for a long time.
Assess your hair needs first and foremost.
A protein treatment before you install your braids is a good starting point and this you can do at home or at the salon where you get your braids installed.
Having a protein treatment before installation is good preventative hair care as it allows your hair strands to be strengthened before you put it into protective styling. However, make sure you know your hair and its needs, as well as how it reacts to protein. Some naturals can benefit from frequent protein treatments, while others only do them once in a while.
NaHaZo recommends a deep moisturizing treatment before installing braids so that you can add moisture to your strands before braiding. This will also make it stronger and less likely to snap and break as the stylist is installing the braids.
3.Moisturise after braiding
Do not commit the cardinal sin of protective styling and forget about your hair’s needs after putting them in braids.
You should maintain your hair’s moisture needs even after installing braids. This is especially true when you install braids as a protective style in winter.
This, you will find, will not only improve the overall health and look of your hair, but you will find that your hair is easier to detangle and manipulate during take down.
Some naturals experience difficulties introducing moisture evenly when they have braids in, especially thin, long braids.
It is therefore a good idea to invest in a bottle with a thin dispensing nozzle. This nozzle will allow you to easily and quickly introduce moisture to your scalp hair evenly. Also do not forget to massage your scalp, for added benefit.
4. Use a light oil in moisturising routine
It is not enough to use any oil, but rather use the right oil for your hairstyle.
 In as much as your hair is tucked away in your braids, it still needs moisture, as does your new growth. This is why when you have braids installed, it is important to use a light oil so that it does not sit on top of the braids, causing junk and acne (should it continually land on your face).
Make sure you use a light oil such as jojoba oil, grapeseed oil, and the like, and steer clear of heavier ones like castor or coconut oil.
Keep away from heavy creams and other oils that you may ordinarily use when your hair is not in a braided protective style. The issue with heavy oils is that they are not only likely to cause itching and scalp issues, but they can cause build-up on your hair, which can cause unnecessary breakage during takedown.
Again, be sure to assess and continually assess your hair needs, and as you and your hair are unique, work with the oils that are right for your hair needs.
5. Invest in a leave-in conditioner
Using a good leave-in conditioner allows you to care for your hair when it is in braids. Using a leave-in conditioner introduces and maintains moisture for longer as well as allows you to maintain your hair for longer.
You can either use a homemade DIY leave-in conditioner or a store-bought one.
A quick DIY hack for a leave-in conditioner is to dilute your normal conditioner with water. You can mix the two in a spray bottle and then use it as a daily spritz for your hair.
For extra moisture penetration into your hair strands, you can wrap up your hair in a plastic cap for a few minutes each day, as you get ready. Do this bagging routine once a week to maintain the moisture levels in your hair.
6. Change your parting
This is especially important for those naturals who normally side or middle part their hair.
 Always be careful and aware of the parting that your style is in.
If you are experiencing breakage in the middle of your scalp or on the side, then avoid parting your hair in this area as you will experience extra strain making that area more vulnerable to breakage.
Also, if you have a middle part and always put a strain on it by having the same hairstyle, then the chances of traction alopecia on this part of your hairline are high. Should you suffer from traction alopecia, then you should vary where you part your hair to avoid putting strain on a particular part of your scalp.
Be constantly vigilant and aware of what is happening with your hair and should you notice that a part of your scalp is taking strain, you can switch up your protective style and opt for something other than braids to allow that area to recover.
7. Scalp care
Having your hair in braids is a great time to care for your scalp, as it is easily accessible.
 Make sure that you wash your hair often, concentrating mostly on your scalp.
Co-washing often is not recommended, as you will need to clear up the build-up trapped after an LCO or LOC routine, especially if you have used heavy oils.
Again, a plastic bottle with a nozzle will come in handy, and make sure you apply the shampoo to your scalp directly. After rinsing it off, you can finish off with an ACV scalp rinse. This will not only clarify your scalp but also get rid of any underlying product build-up.
8. Dry gently
Do you have an old cotton tee shirt of two that you can spare? Great! You can add this to your natural haircare essential pile.
Cotton tees are a great hack for drying your hair on wash day as they not only reduce frizz but allow you to maintain your style for longer.
Avoid rough toweling and using towels that are drying, or snag on your hair. Also, when you dry your hair, instead of rubbing it back and forth, rather pat it dry gently. You can also air dry your hair, weather permitting.
Drying your hair completely also helps avoid any chance of additional scalp issues. Plus avoid keeping your scalp wet for long periods, as this is a perfect breeding ground for fungal infections.
9. Stick to a hair Regime
Having your hair in protective styling is a perfect opportunity to practice and stick to a consistent hair regime.
Some naturals neglect their hair when it is in braids /are not as consistent with their hair care. However this is a costly mistake as, after take down, you are unlikely to retain all of your length gains.
If you want to see your hair grow to each milestone, get into a K.I.S.S regime when your hair is in protective styling.
Washing, clarifying, and moisturizing your hair, together with a monthly deep conditioning session thrown in at least once a month is a good start. You will be surprised to find out that this is all you will need to get the most growth out of your protective styling phase.
10. Wrap your hair at PM
 Ladies, wrap your hair in the night.
This is a good practice to get into!
Invest in a good silk scarf and make sure you wrap your hair at night. This will help maintain the style for longer, as well as put less strain on your edges should you be a restless sleeper.
Steer clear of any cotton headscarves!
While these are great for drying hair on wash day, it will suck whatever moisture you have in your hair, leaving it dry, should you wrap your hair in cotton at night.
Rather opt for a silk or satin wrap – it will be worth the maintained hairstyle and healthy hair!
11. Hydrate from the Inside out
The less said about this, the better. You know the drill naturals, drink up!
 Drinking water is great for hair growth, as well as the overall look of your hair.
Set a daily water goal and stick to it. You will then find that when you uninstall your braids, your hair will be healthier for it.
12. Swim Care
Avoid leaving your braids in a low ponytail or free-flowing, if your workout regime/lifestyle is such that you swim frequently.
The first prize is a swim cap as this will keep your hairstyle for longer.
Should a swim cap not be an option for you, then one or two cornrow lines with your braids are ideal to keep your hair off your face and shoulders. This hairstyle also helps avoid the added strain of water-soaked braids on your hairline.
13. Refresh your style
The great thing about braids is that you can refresh your look.
 Should you want to keep the style for longer and you do not want to go through the trouble of re-doing your plaits – then refresh.
You can redo the first few rows of your plaits and this helps to still maintain a neat, fresh look to your hairstyle.
Refreshing your braids is a quick hack that can be a go-to in those busy months. This is especially true when you have a function, but don’t have the time to take down your braids or get a new hair-do.
14. Do not keep braids too long
As a natural, it is important not to keep your braids for too long, especially if you have installed long, thin braids or box braids.
When your hair has been in protective styling for a while, your new growth will not be able to withstand the weight of the braids. This places a strain on your growth, as well as your scalp, and can result in traction alopecia.
Naturals usually notice the thinning of hair around the hairline when this happens.
To avoid this, do not keep your braids for too long. Also, product build-up from moisturising your hair increases the likelihood of your hair snapping or breaking during takedown. This usually happens around the build-up zone of the new growth and the attached braid.
14. TLC before takedown
A great NaHaZo TLC hack is to give your hair a good hot oil treatment the night before you remove your braids.
This is a huge game changer in un-doing your braids after a long period of protective styling!
Wrap your hair in a plastic cap, secure it with a wrap, and then leave it overnight. Doing this has the effect of softening your hair, making it easier to manipulate as you undo the plaits.
Also, your hair is well moisturised and thus unlikely to snap and break.
15. TLC during takedown
 The takedown of a protective style is very important as it determines how much of your length you get to keep.
Some naturals lose whatever gains they made during protective styling because they undid their plaits in a hurry. This happens when naturals do not take the time to nurture their hair during the takedown.
As a rule, schedule your takedown on a day when you are not too busy. This will allow you to gently manipulate your hair without ripping or snagging your strands.
Also, if you have kept your braids in protective styling for a long time.
NaHaZo advises finger detangling to ensure that you can properly separate your hair, as well as gently remove any shed hair.
Another tip is to use a thin pick to take down your braids and avoid combing or brushing your hair until it is fully finger-detangled. And whatever you do, do not enlist help from any impatient stylists who will rip or leave tangles in your hair.
16. TLC after takedown
In the same way, you showed your hair some TLC before and during the takedown, you should also care for your braids after undoing them.
Hot oil treatment? Protein Treatment? Deep conditioning pack?
All these are key hair care essentials after you have unraveled your hair. Assess your hair needs and act accordingly. You can do 1, 2, or all 3 of these.
Treating your hair after takedown allows you to enjoy gains made during protective styling.
17. Give your scalp and hair a break
Have a protective styling vacation.
Do not be quick to reinstall braids, but rather give your scalp and hair a chance to breathe before installing them again. Lifestyle permitting, do not rush into the next protective styling such as braids or cornrows, but rather áir’ your hair and scalp out.
NaHaZo does not recommend back-to-back wearing of braids.
Wear out your hair for a week or three and allow yourself to get reacquainted with your hair. This is a good time to assess the health of your hair, how much it has grown, and what you need to do to maintain or improve its health.
18. Take photos
 Do this to remind yourself how far you have come!
This helps build confidence in your hair regime and also reminds you that what you are doing is not in vain.
This will give you motivation to continue on your hair journey.
Taking photos is also part of getting to know your hair intimately – which only you can do.
No person – not even the best stylist out there – is in a position to know your hair as well as you!
So always take the time to document where you are at in your hair journey.
19. Share your insights
Being on a natural hair journey is being part of a wider community. We all learn and grow from one another.
So it is important to share your insights with fellow naturals via word of mouth or on a forum. This allows those who need help to also benefit from your journey. Whether you share with just that one friend, sibling, or parent –whatever you do – do not walk and grow alone.
If it has worked for it, it is likely to work for another natural. Share your tips, start the conversation, and help grow the natural hair community and awareness by sharing your story.
Check out NaHaZO’S Natural Hair Care for Kids Series to catch up on how the natural hair community cares for little Fros.
20. Bonus: TAKE STOCK
The crown is on your head.
 Your hair journey needs you to take stock and ask yourself a couple of questions, so you can be better informed the next time around in your protective styling. Some of the more pressing questions to ask are:-
- How did your hair behave in your previous style?
- Did it work with your lifestyle?
- How were the stylists?
- How easy was it to maintain the chosen style?
- Would you do it again?
- What lessons have you learned about your hair in this style?
- What lessons have you learned about protective styling with braids that you would do again?
- What lessons have you learned about protective styling with braids that you would not do again?
- What routine and products worked for you during this phase?
Wanna know more about the 4C Hair type?
Armed with this Ultimate Braid Care guide, going forward, your next protective styling and hair journey should be a breeze.
Let us know in the comments how long you usually keep your braided protective style and how you care for your hair during this period.